How To Make
  • Home
  • Food
    • All
    • Tips
    Avocado Fudge

    Avocado Fudge – A Small Dish of Avocado

    Qeema

    How to Make Qeema

    Bread burfy

    How to Make Bread Burfi

    Popcorn

    How to Make Popcorn at Home

    Banana chips

    How to Make Banana Chips

    Scotch Egg

    How to Make Scotch Egg

    Butter Sponge Cake

    How to Make Butter Sponge Cake

    Egg Salad

    How to Make Egg Salad

    Chickpea Egg Salad

    How to Make Chickpea Egg Salad – A Salad With Peas and Eggs

    • Tips
  • Technology
    • All
    • Coding
    Shared Album on iPhone

    How to Make a Shared Album on iPhone: A Step-by-Step Guide

    Windows 11

    How to Make a Computer of Windows 11

    Speech tool main

    How to Create a Text to Speech Tool by 4 Code Line Using the Notepad.

  • Design
    How To Make Vesak Lantern

    How to Make a Vesak Lantern

  • Life
    How to Make Soap at Home.

    How to Make Soap at Home

    How To Make Vesak Lantern

    How to Make a Vesak Lantern

    Paper Boat

    How to Make a Paper Boat

    Speed up Pregnancy

    How to Make a Baby: 7 Steps to Speed up Pregnancy

  • Craft
    How To Make Vesak Lantern

    How to Make a Vesak Lantern

    Paper Boat

    How to Make a Paper Boat

No Result
View All Result
How To Make
No Result
View All Result
Home Technology

How to Make a Shared Album on iPhone: A Step-by-Step Guide

admin by admin
April 4, 2025
in Technology
0 0
0
Shared Album on iPhone
0
SHARES
5.2k
VIEWS
Share on FacebookShare on Twitter

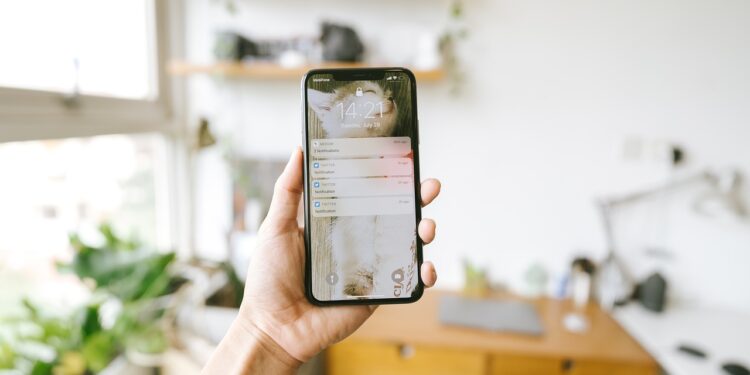
Are you looking for an easy way to share your favorite photos with family and friends using your iPhone? Apple’s iCloud Shared Albums feature makes sharing photos and videos seamless across all iOS devices. Whether it’s vacation memories or special events, you can create a shared album in minutes. This guide will walk you through the process of creating and managing a shared album on your iPhone.

Why Use Shared Albums?

Shared Albums in iCloud allow you to:

  • Share photos and videos with multiple people.
  • Invite others to view, comment, or add their media.
  • Access your album on all your Apple devices.
  • Save storage by hosting photos in iCloud instead of your device.

Now let’s dive into how you can set up a shared album on your iPhone.

Step-by-Step Guide to Creating a Shared Album on iPhone

1. Make Sure iCloud Photo Sharing is Enabled

Before you can create a shared album, ensure that iCloud Photo Sharing is enabled. Here’s how:

  • Open the Settings app on your iPhone.
  • Tap [Your Name] at the top of the screen.
  • Go to iCloud > Photos.
  • Toggle Shared Albums on.

This ensures that you can create and share albums with others.

2. Create a New Shared Album

Once iCloud Photo Sharing is enabled, follow these steps:

  • Open the Photos app on your iPhone.
  • Select the Albums tab at the bottom of the screen.
  • Tap the + icon in the top-left corner and select New Shared Album.
  • Give your album a name that reflects the theme (e.g., “Family Vacation 2024”).
  • Tap Next.

3. Invite People to Your Shared Album

Now it’s time to invite family and friends to your shared album:

  • In the “To” field, enter the email addresses or phone numbers of the people you want to invite.
  • Tap Create.

Your invitees will receive a notification and can accept the invitation to view and contribute to the album.

4. Add Photos and Videos

Adding media to your shared album is easy:

  • Open the Shared Album you created.
  • Tap the + icon to start adding photos or videos.
  • Select the items you want to share and tap Done.

You can also add captions or comments to individual photos, making it more interactive for everyone involved.

5. Manage Your Shared Album

You have full control over your shared album. Here are some things you can do:

  • Remove people: If you need to remove someone from your album, go to the album, tap the People tab, and select the person you wish to remove.
  • Delete photos: To delete a photo, simply tap it, hit the trash can icon, and confirm.
  • Stop sharing the album: If you want to stop sharing entirely, go to the album settings and tap Delete Shared Album. This will remove the album from everyone’s devices.

Bonus Tips for Managing Shared Albums on iPhone

  • Comment and Like Photos: Everyone in the album can leave comments and likes on photos, making it a fun and interactive way to share memories.
  • Share with Non-Apple Users: If your friends don’t have Apple devices, you can still share the album by enabling the Public Website option in the album settings. This allows them to view the album via a web browser.
  • Storage Tips: Shared albums don’t count toward your iCloud storage limit, but photos and videos are downscaled to 2048 pixels on the long edge to save space.

Conclusion

Creating a shared album on your iPhone is a convenient way to share memories with your loved ones. You can easily create and manage a shared album with just a few taps, whether for a special occasion or everyday moments. The iCloud Shared Albums feature allows for seamless sharing, even with non-Apple users.

By following this step-by-step guide, you can set up and use shared albums effectively. Start sharing today and bring your friends and family closer through your iPhone!

Previous Post

How to Make Soap at Home

admin

admin

ADVERTISEMENT

You might also like

Shared Album on iPhone

How to Make a Shared Album on iPhone: A Step-by-Step Guide

April 4, 2025
How to Make Soap at Home.

How to Make Soap at Home

April 4, 2025
How To Make Vesak Lantern

How to Make a Vesak Lantern

April 4, 2025
Windows 11

How to Make a Computer of Windows 11

April 4, 2025
Paper Boat

How to Make a Paper Boat

April 4, 2025
Avocado Fudge

Avocado Fudge – A Small Dish of Avocado

April 4, 2025
ADVERTISEMENT

ABOUT US

How to Make is a website created to upgrade your day-to-day activities with ease. We provided you with an enormous amount of knowledge & information about technology, gadgets, designs & even food etc… You can visit our website for further information.

Stay Connected

  • Home
  • Privacy Policy
  • Terms and Conditions

© 2021 HWTOMAKE.COM All Rights Reserved

No Result
View All Result
  • Home
  • Food
    • Tips
  • Technology
  • Design
  • Life
  • Craft

© 2021 HWTOMAKE.COM All Rights Reserved

Welcome Back!

Login to your account below

Forgotten Password?

Create New Account!

Fill the forms below to register

All fields are required. Log In

Retrieve your password

Please enter your username or email address to reset your password.

Log In